Writing Workflow
Since I'm trying to write more articles and post updates regularly to my personal site I set out to create a writing workflow.
Reading time 8 mins ■ 1695 wordsWhy write? 
Writing is a general good skill to have and it's the best medium to voice
your opinions. For me it's a way to understand the material I'm personally learning and write things to remember them. This is my entire writing workflow, from initial idea to draft to published article.
Some guiding principles for my workflow:
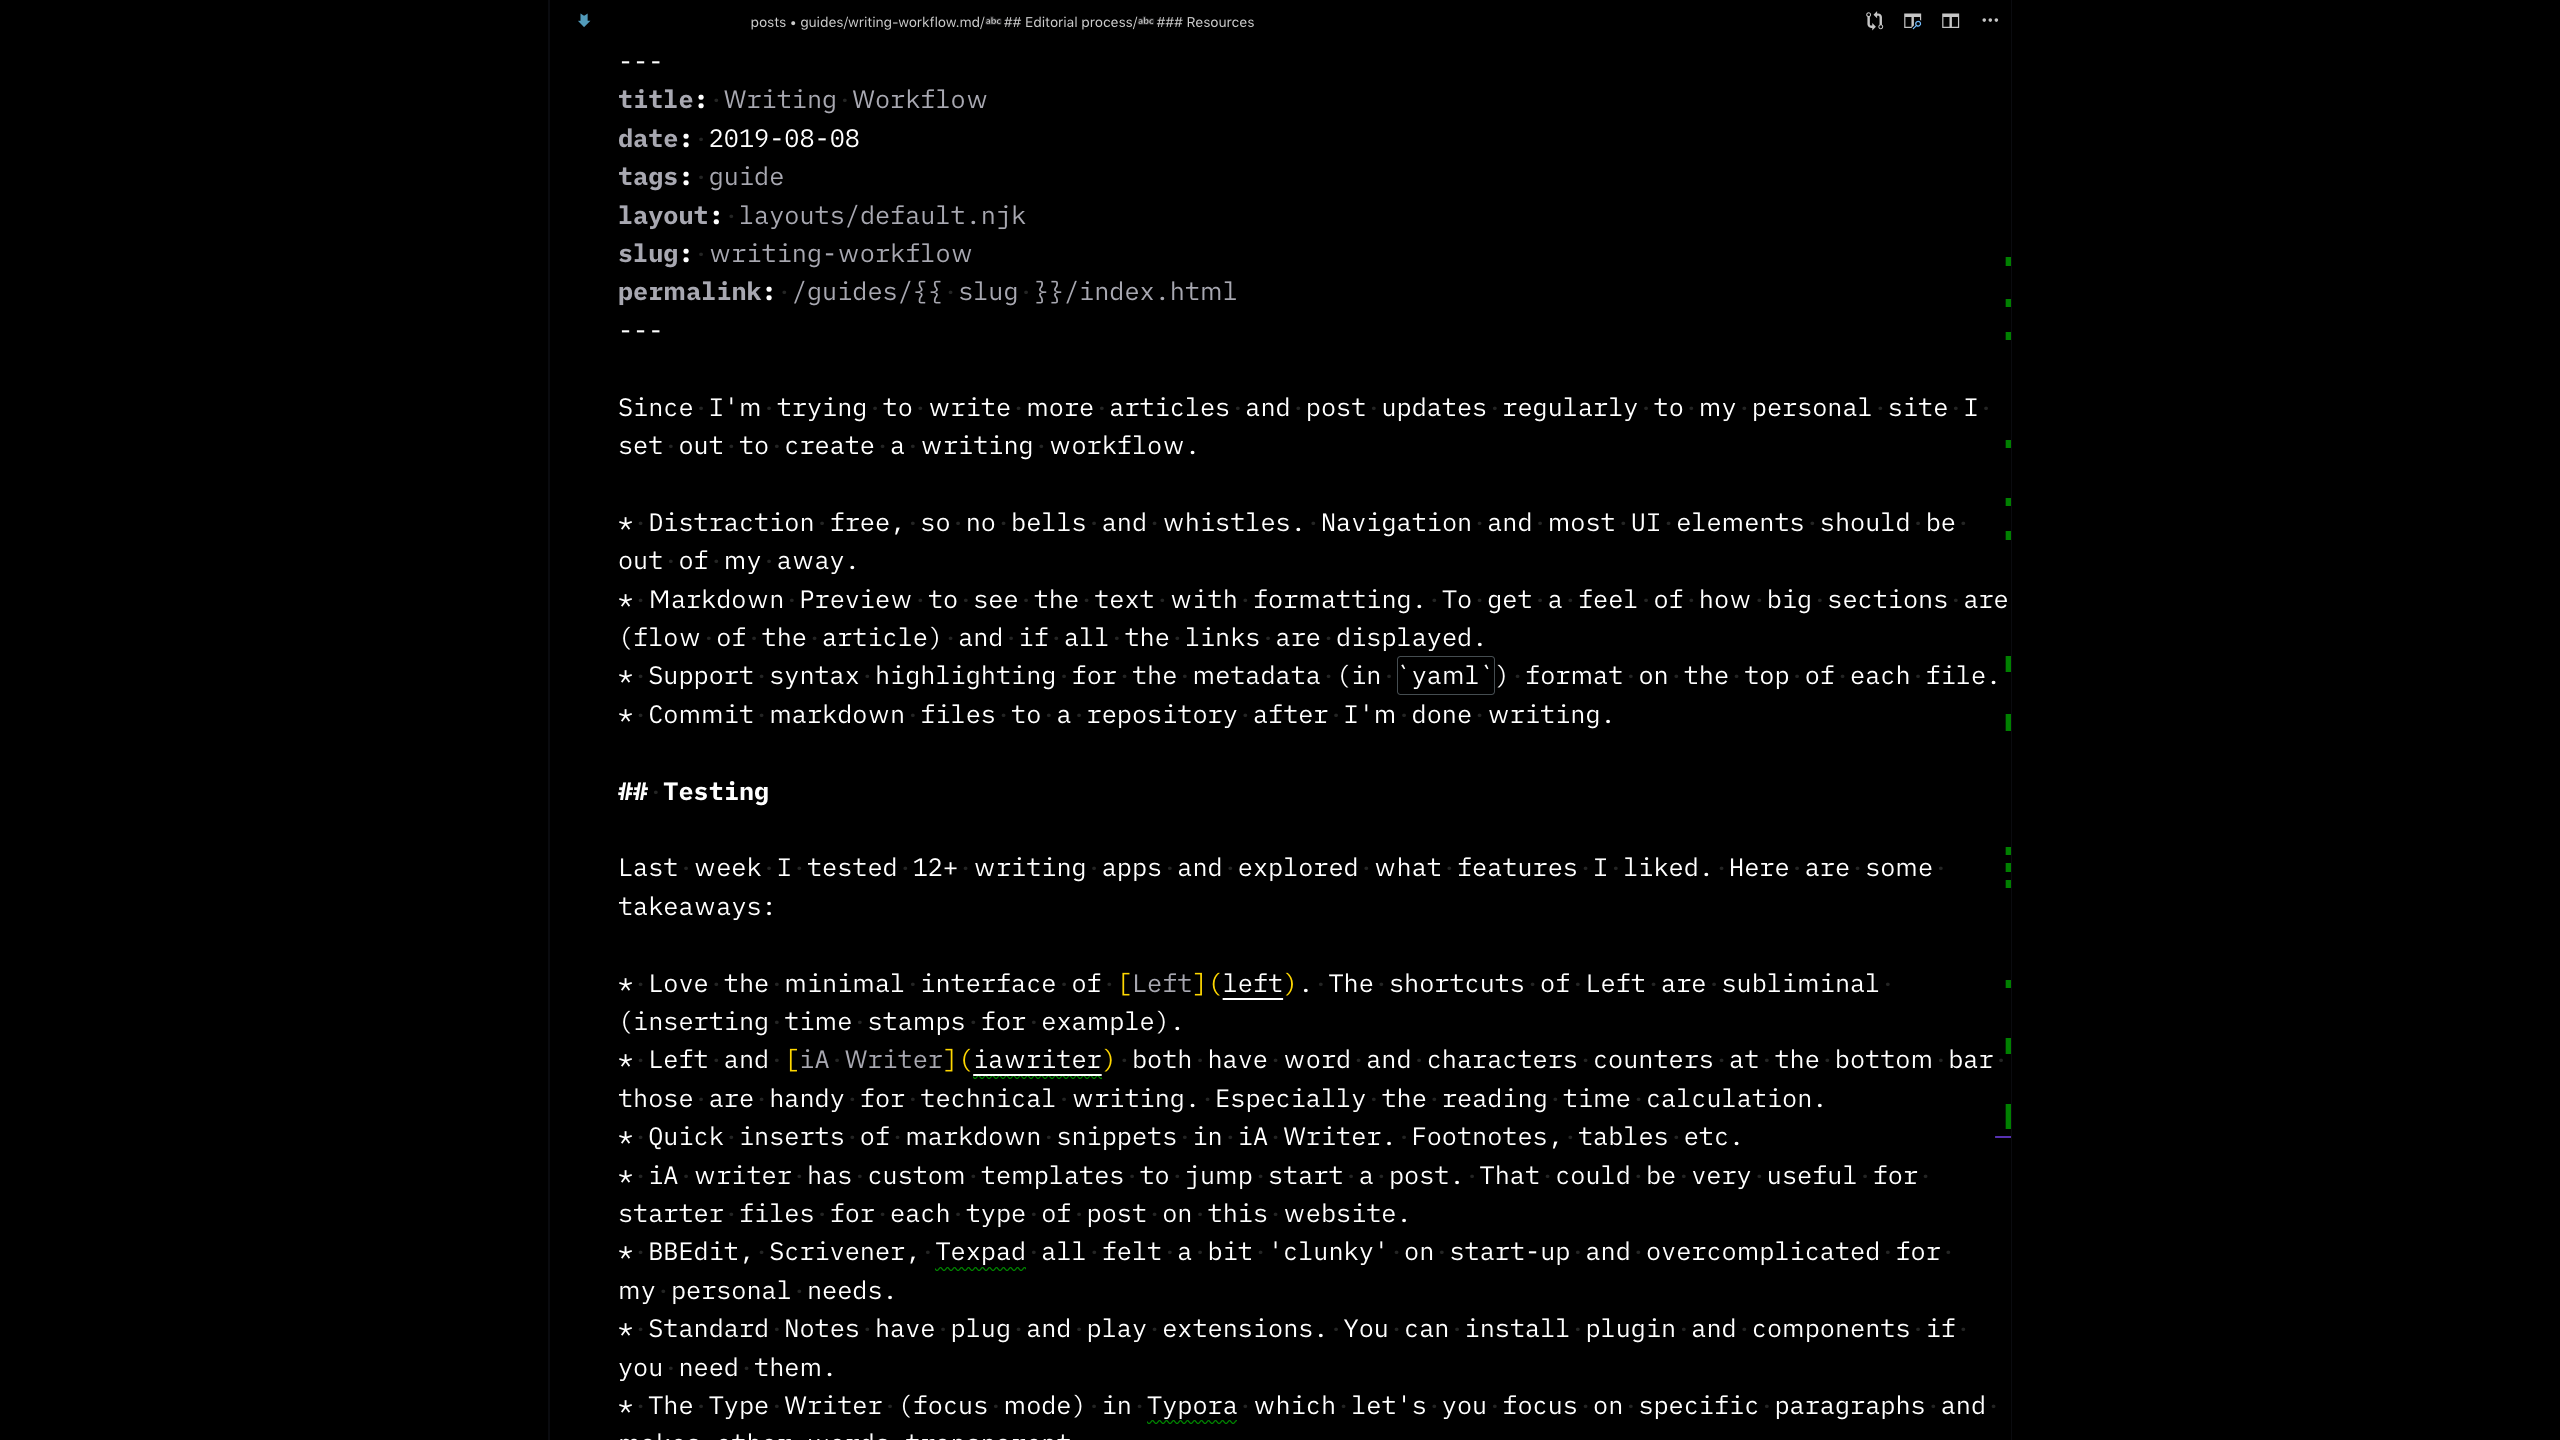
- Distraction free, so no bells and whistles. Navigation and most UI elements should be out of my away.
- Markdown Preview to see the text with formatting. To get a feel of how big sections are (flow of the article) and if all the links are displayed.
- Support syntax highlighting for the metadata (in
yaml) format on the top of each file. - Commit markdown files to a repository after I'm done writing.
I thoroughly tested 12+ writing apps and explored their features. After all that testing it struck me, VS Code has lots of these features already built-in. Can I just use VS Code as my default writing app? Code editors have a bunch of useful features for editing text. Since I'm spending most of my time looking at my editor anyways it's seemed like the obvious choize.
Editor 
VS Code has a zen mode to get rid of most of the UI. That is a quick win to make it feel more like a writing app. With the introduction of workspaces you can configure settings for specific folders. It's easy to change color themes based on the folders you are in. So I have workspace that puts me in my posts folder of the website. It then changes my color theme to White Night and sets the writing font to Duospace. I'll use cmd + b to toggle the sidebar to navigate files, cmd + shift + p to preview markdown and use ctrl + backtick to open the integrated terminal to commit markdown files. Some must use extensions are:
Editorial process 
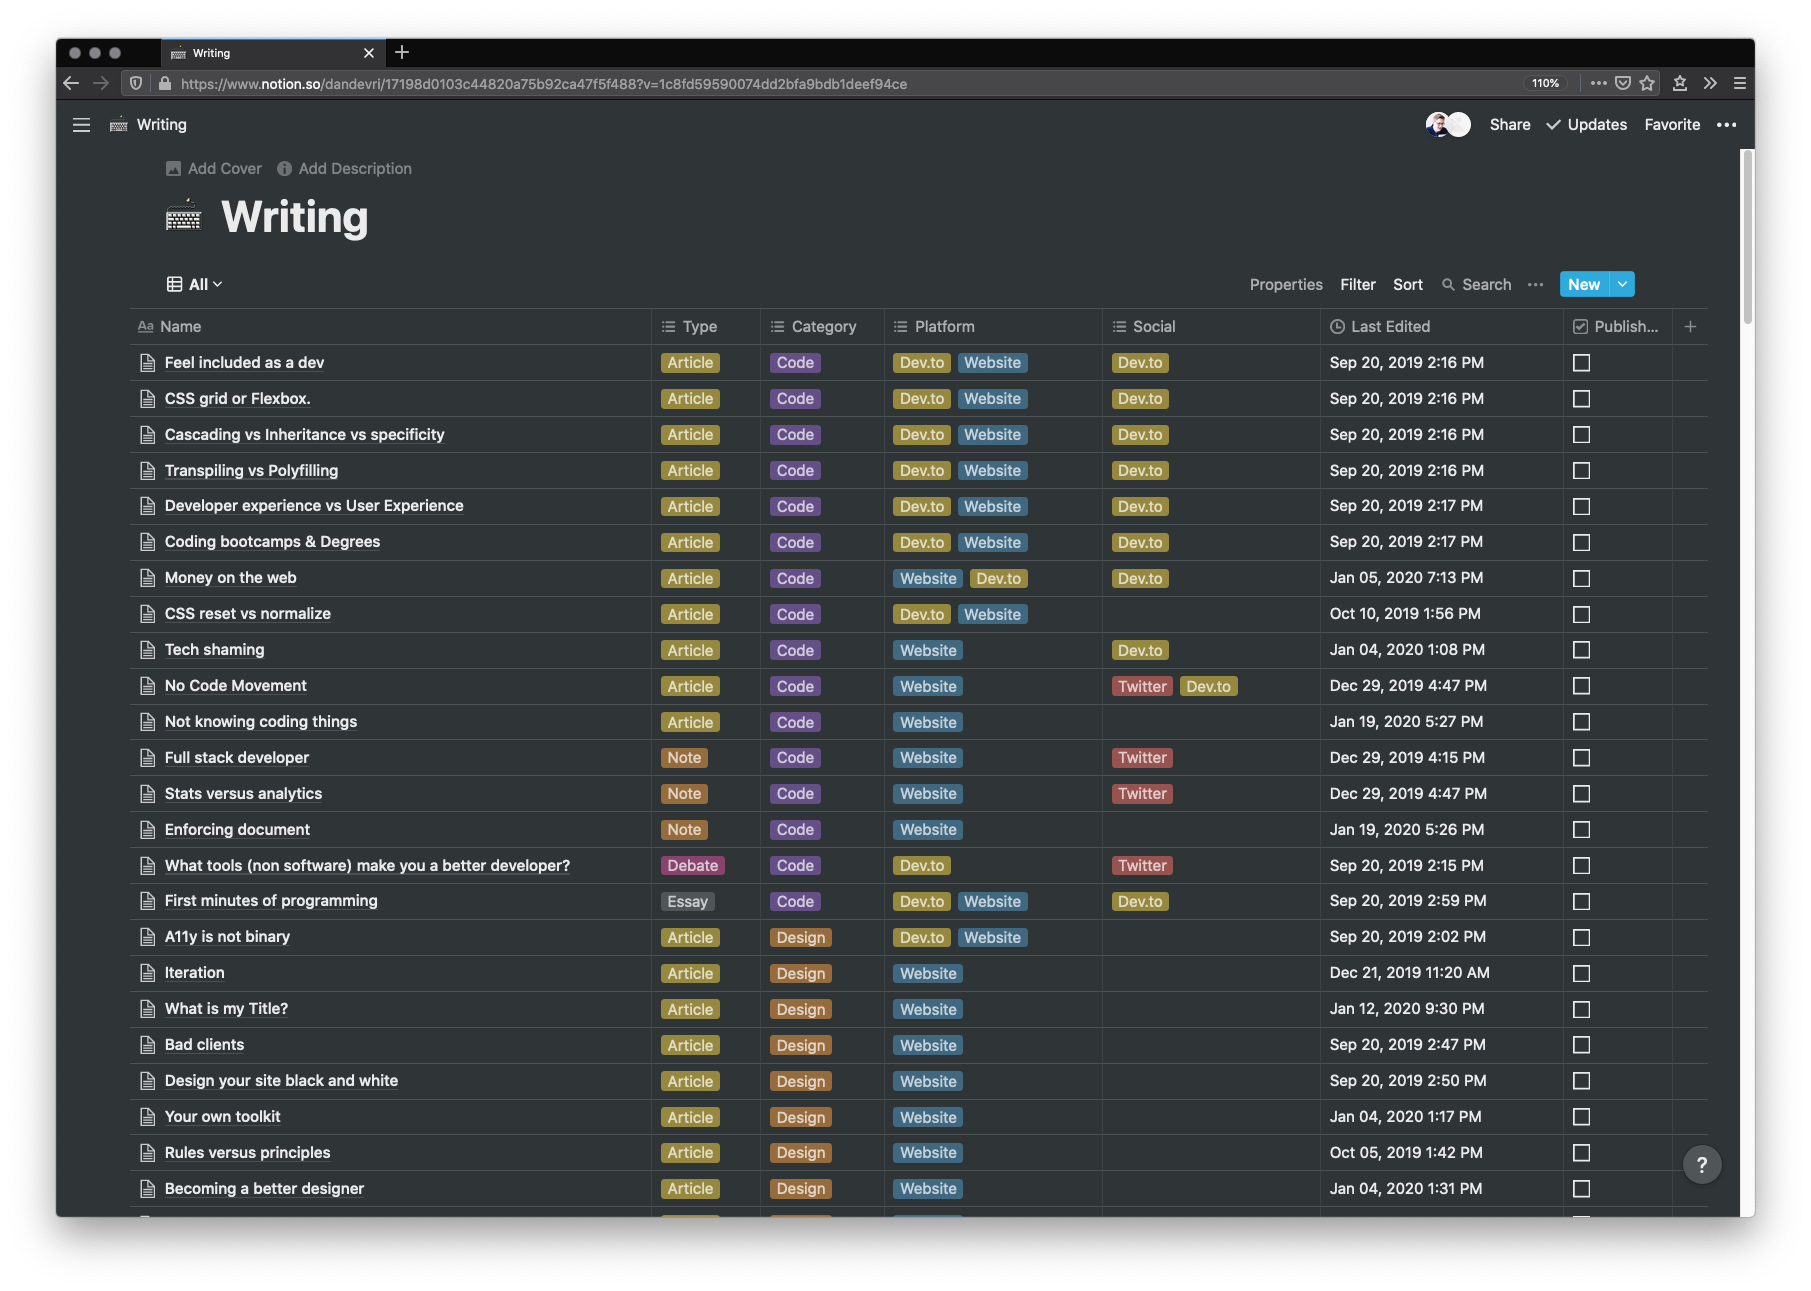
Every time a new idea of an article pops up in my head. I'll add it to my writing Notion Board with initial thoughts and the resources where I got the idea from. I don't usually go 'hunting' for idea's they just accumulate over time. People (student in particular) ask me on my opinions, I usually take note of those and if I get that a questions frequently or that topics comes up frequently I write a post about it. Write down ideas when you get them.
Usually I'll also add a status and created by date. Nothing really methodical but I have basically three stages (inspired by this Tim Ferris podcast) hunting, drafting and editing.
- Hunting: the goal is to just gather as much resources and research material
- Drafting: Just write, it doesn't matter if its fast and bad. The goals is to put as many thoughts out of my head into notion.
- Editing: things like spell checking, punctutation, the flow of the sentences and any other small revisions.
After the final draft is finished I run the text trough Grammarly and the Hemmingway Editor. If the flow of the text still feels off I sometimes let VoiceOver read the article to me. These tools are live-savers for me, it would otherwise take me tons of time to edit which I really don't like doing. After writing the post I do some final checks based on this smashing article template and create the assets for social sharing in Figma. In steps it would look something like this:
- Initial idea with resources
- Gather Resources (material)
- Outline of the post (in bullet points)
- First draft (day one)
- Revisions
- Second draft (day two)
- Revisions
- Final article (day three)
- Review (grammarly + hemmingway)
- Quality Control (checking links, sources etc.)
- Creating assets (banners, quotes etc.)
- Publish on personal website
- Share on social channels
Becoming a better writer 
There is still a huge list of writing related books on my Goodreads shelf to improve my writing skills but Writing for designers by Scott Kubie is a great starter. On Writing Well by William Zinsser and Bird by Bird by Anne Lamott are good books to a bit more in-depth. For better technical writing the Shoptalk Show Episode with Rachel Andrew is a good listen. Writing for all types of audiences is not that easy. Make sure to avoid these words. We define our words, but they don't define us.
- It's not because its already written you shouldn't write.
- Creating a content calendar forces you to write and stick to deadlines.
- Double check your snippets. Try the code before you post.
- It's okay to edit after the effect and correct mistakes.
- You don't have to be an expert to have your own opinion.
- What's obvious to you might not be obvious to others
- Be hesitant about writing for free on other publications. Exposure is not compensation.
Style Guide 
I'm still working on this part. The idea is to have some general quality guidelines. Currently looking at Smashing Magazine Style Guide, Shopify Voice and Tone, and MailChimp Voice and Tone. Before publishing I usually do some quality control and one final review based on the Smashing article template.
- Keep my (short) articles around ~1000 words with a maximum of ~2000 words.
- The title shoud be around ~30 characters.
- Heading levels are correct and are logically placed (where they need to break text)
- Don't explain why I wrote something but explain why they should read it.
- Be honest and don't try to be an expert.
- Swear only if it's necessary to make the point.
- It's better to be clear than funny.
- Never ever tech shame.
- Don't relly on links in text alone, they should only provide context.
Application testing 
- Love the minimal interface of Left. The shortcuts of Left are subliminal (inserting time stamps for example).
- Left and iA Writer both have word and characters counters at the bottom bar those are handy for technical writing. Especially the reading time calculation.
- Quick inserts of markdown snippets in iA Writer. Footnotes, tables etc.
- iA writer has custom templates to jump start a post. That could be very useful for starter files for each type of post on this website.
- BBEdit, Scrivener, Texpad all felt a bit 'clunky' on start-up and overcomplicated for my personal needs.
- Standard Notes have plug and play extensions. You can install plugin and components if you need them.
- The Type Writer (focus mode) in Typora which let's you focus on specific paragraphs and makes other words transparent.
Resources 
- Blogging Workflow by Ali Spittel
- My Blogging Editing Process by Lindsey Kopacz
- Writing Mode in VS Code by Diéssica Gurskas
- SyntaxFM on Blogging
- A blogging style guide by Robert Heaton